
Importing Master Parts Pricing
Overview
This guide outlines the process for importing pricing data into the Master Part Pricing module. Pricing records link cost and retail values to existing master parts on a per-branch basis.
Prerequisites
Before importing master part pricing, ensure the following requirements are met:
- Master Parts must already exist in the system. Pricing records cannot be created without corresponding parts. If you have not yet added your master parts, refer to the Master Parts Importing Guide and complete that process first.
- At least one Master Part Pricing entry must be created manually. The Export and Import buttons will not appear on the Master Part Pricing page until an initial pricing record has been added.

Step 1: Add an Initial Pricing Entry
- Navigate to Admin > Master Part Pricings.
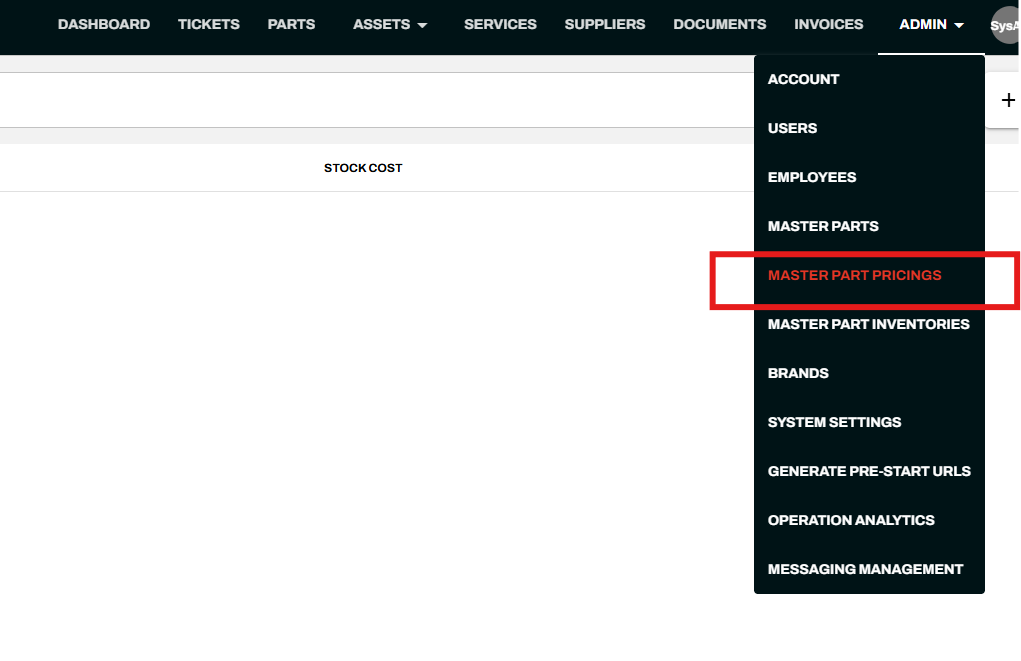
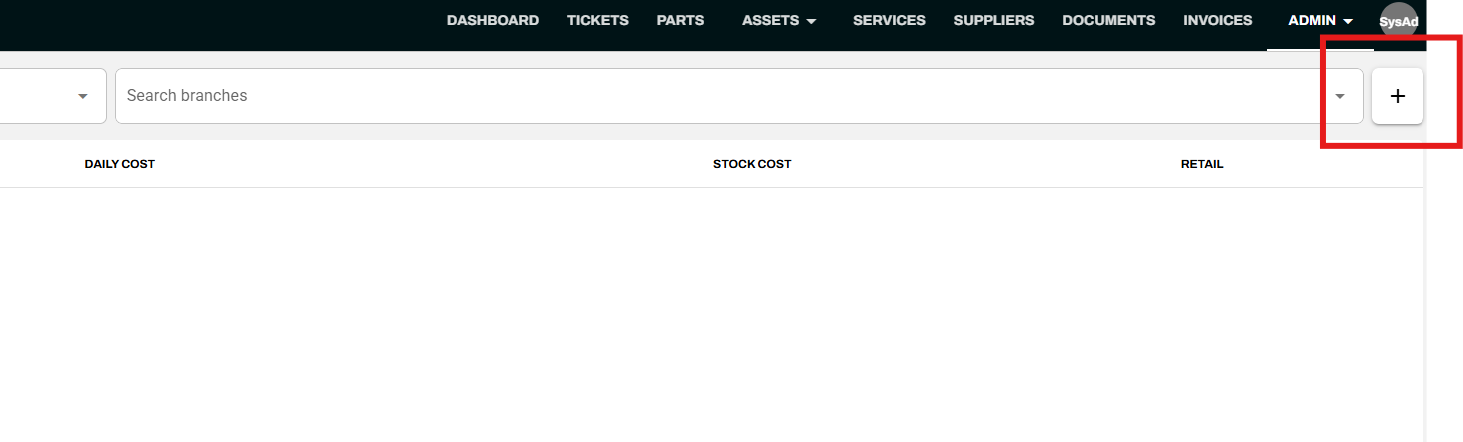
- Click the + button in the top-right corner of the pricing grid.
In the Add Master Part Pricing dialog, complete the following fields:
- Part — Search for and select an existing master part.
- Branch — Search for and select the applicable branch.
- Retail — Enter the retail price for the part.
- Daily Cost — Enter the daily cost, if applicable.
- Stock Cost — Enter the stock cost for the part.
- Average Cost — Enter the average cost, if applicable.
- GST Included — Check this box if the pricing includes GST.
- Discountable — Check this box if the part is eligible for discounts.
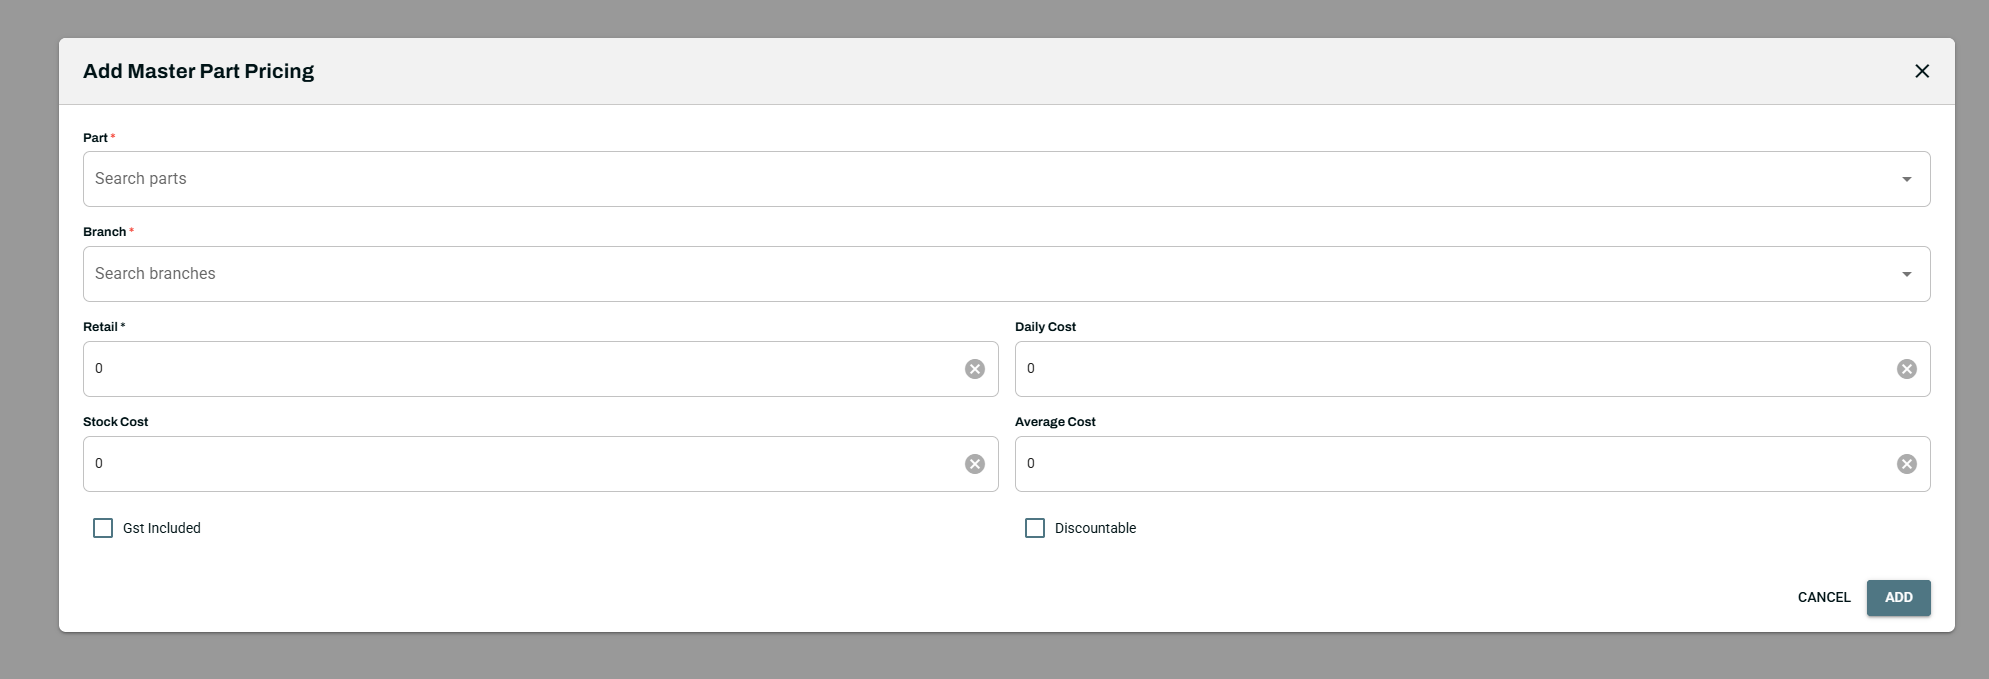
Click Add to save the entry.
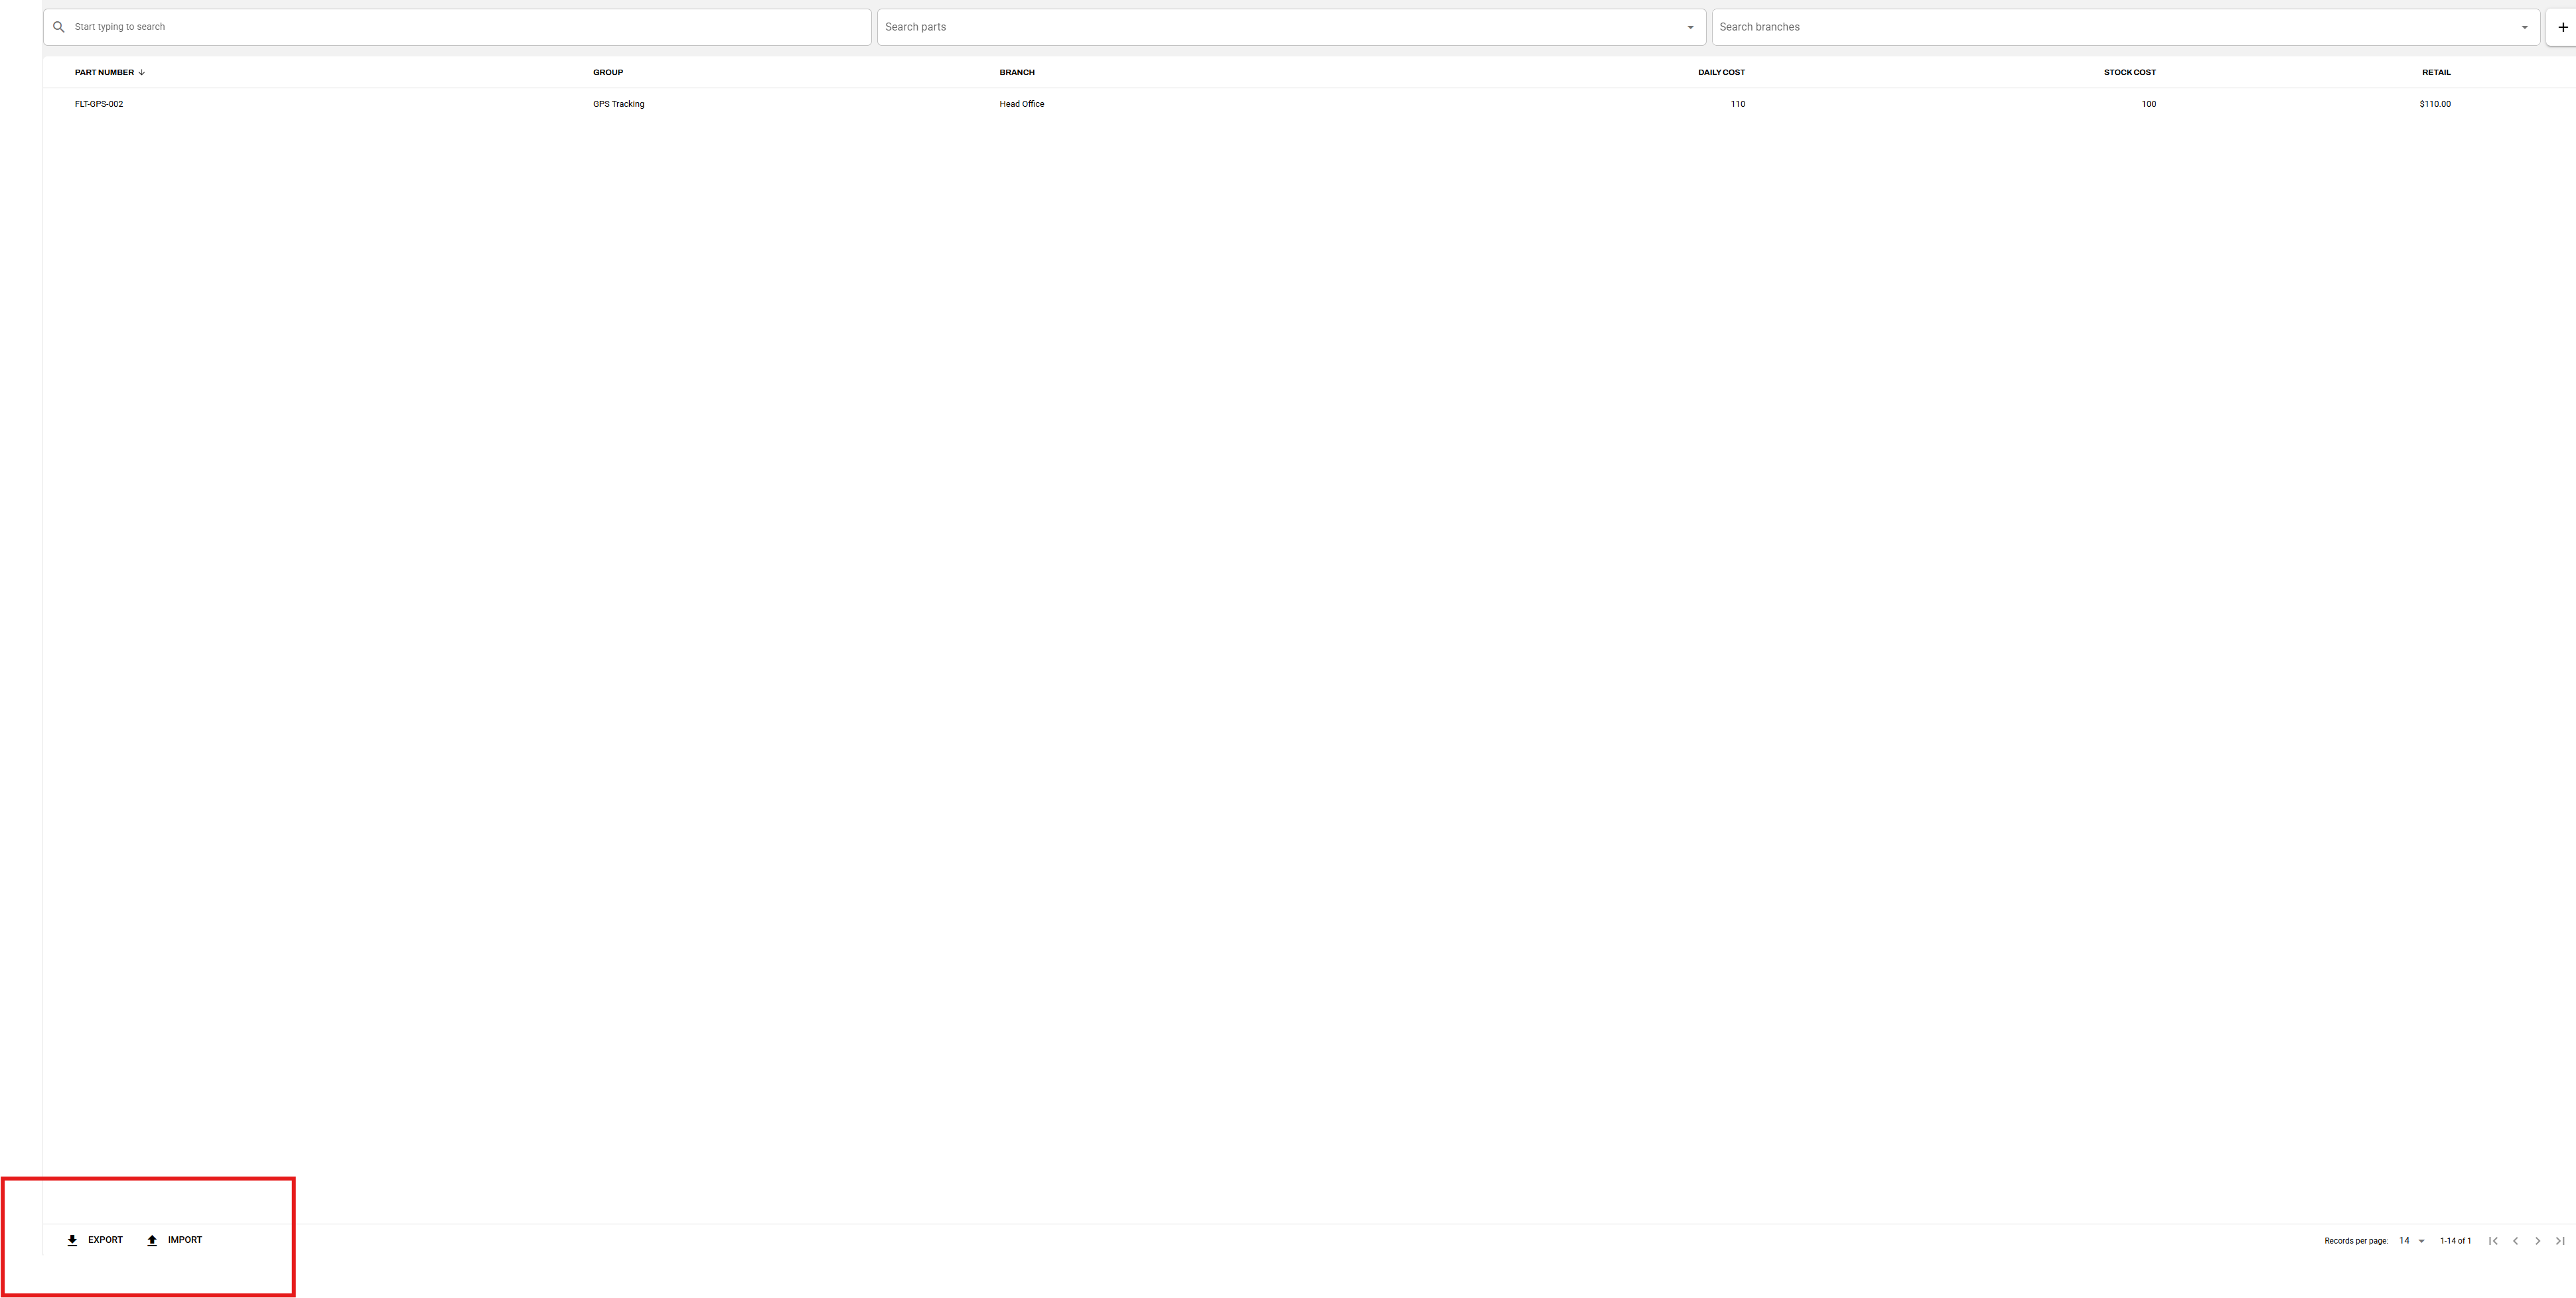
Once saved, the pricing record will appear in the Master Part Pricing grid, and the Export and Import buttons will become available at the bottom of the page.
Step 2: Download and Prepare the Import Template
Download the Template
- Click the Import button at the bottom of the Master Part Pricing page.

- In the Master Part Pricings Import dialog, click Download Import Template.

Populate the Template
Open the template and fill in each row with the appropriate pricing data. Note the following important details:
- Part ID vs. Part Number: The import template requires a Part ID, not the Part Number. To get the Part ID, navigate to the Master Parts page, export your parts data, and locate the Part ID column in the exported file. Use these IDs in your pricing import template.
- List Price = Retail Price: The "List Price" field in the import template corresponds to the Retail column displayed on the Master Part Pricing page.
- Save the completed template as an Excel file in .xls or .xlsx format.
Step 3: Upload the Import File
- Navigate to Admin > Master Part Pricings.
- Click the Import button at the bottom of the page.
- Select Import Master Part Pricings.

- Carefully review the notes displayed in the import dialog before proceeding. These notes describe how the system handles data conflicts and updates to existing records.
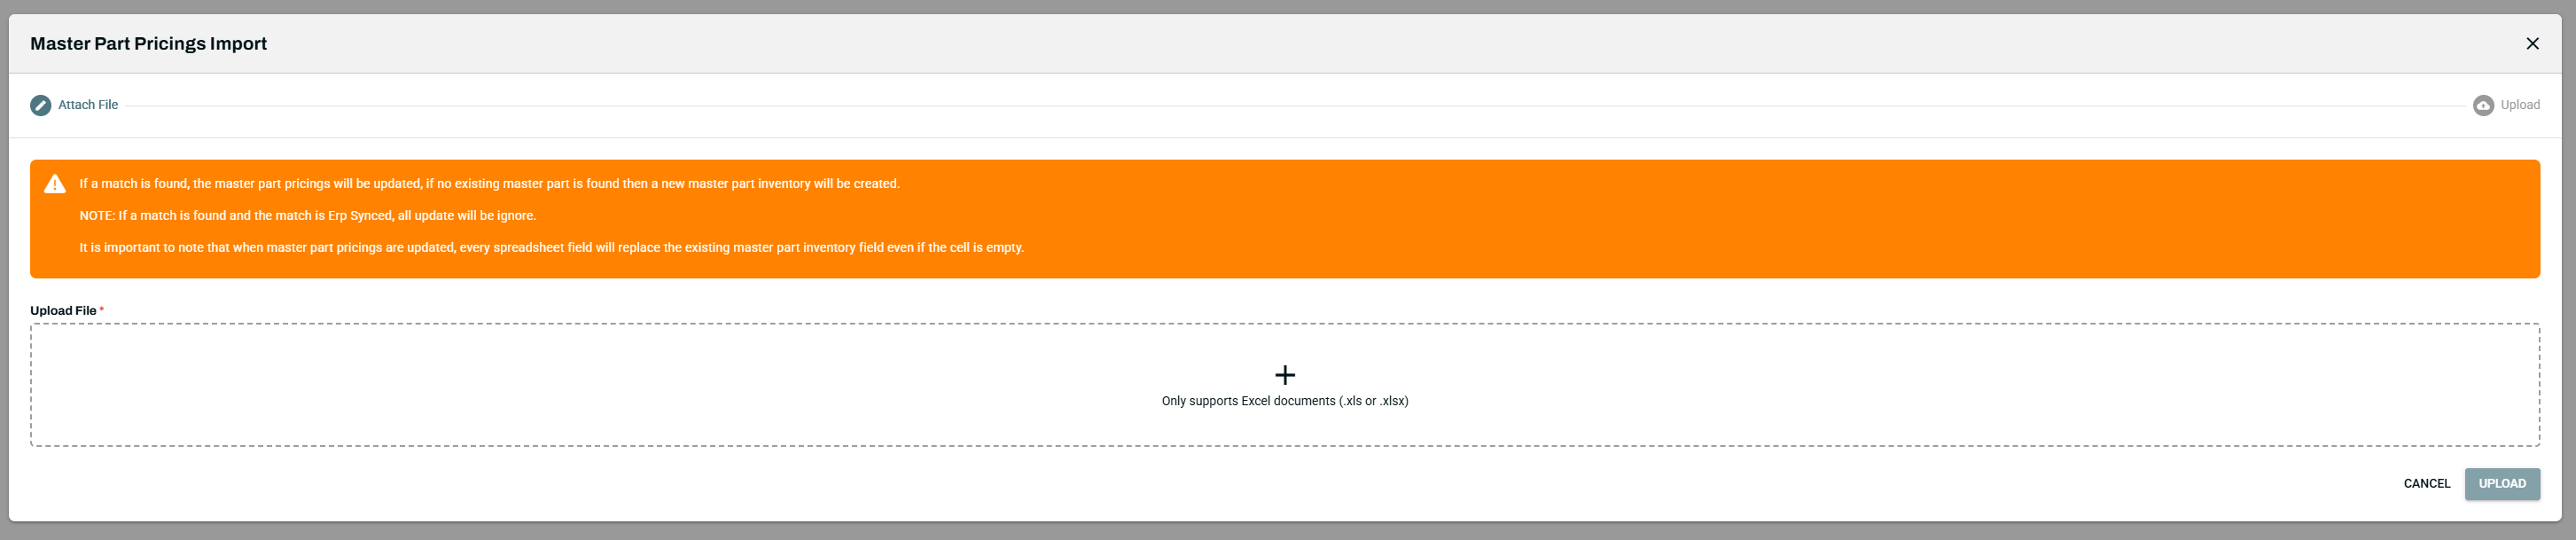
- Attach your file by dragging it onto the + upload area, or click the area to browse for the file on your computer.
- Click Upload to begin the import.
Important: Only Excel file formats (.xls or .xlsx) are supported for import.
Step 4: Verify the Import
After the upload completes, refresh the Master Part Pricing page. The imported pricing records should now appear in the grid with the correct values for each part and branch.
Key Reminders
- Master Parts must be added before any pricing data can be imported.
- The Part ID (not the Part Number) is required in the import template — export your master parts to retrieve these IDs.
- The "List Price" field in the template maps to the "Retail" column in the system.
- Always review the import dialog notes before uploading, as they affect how existing records are handled.