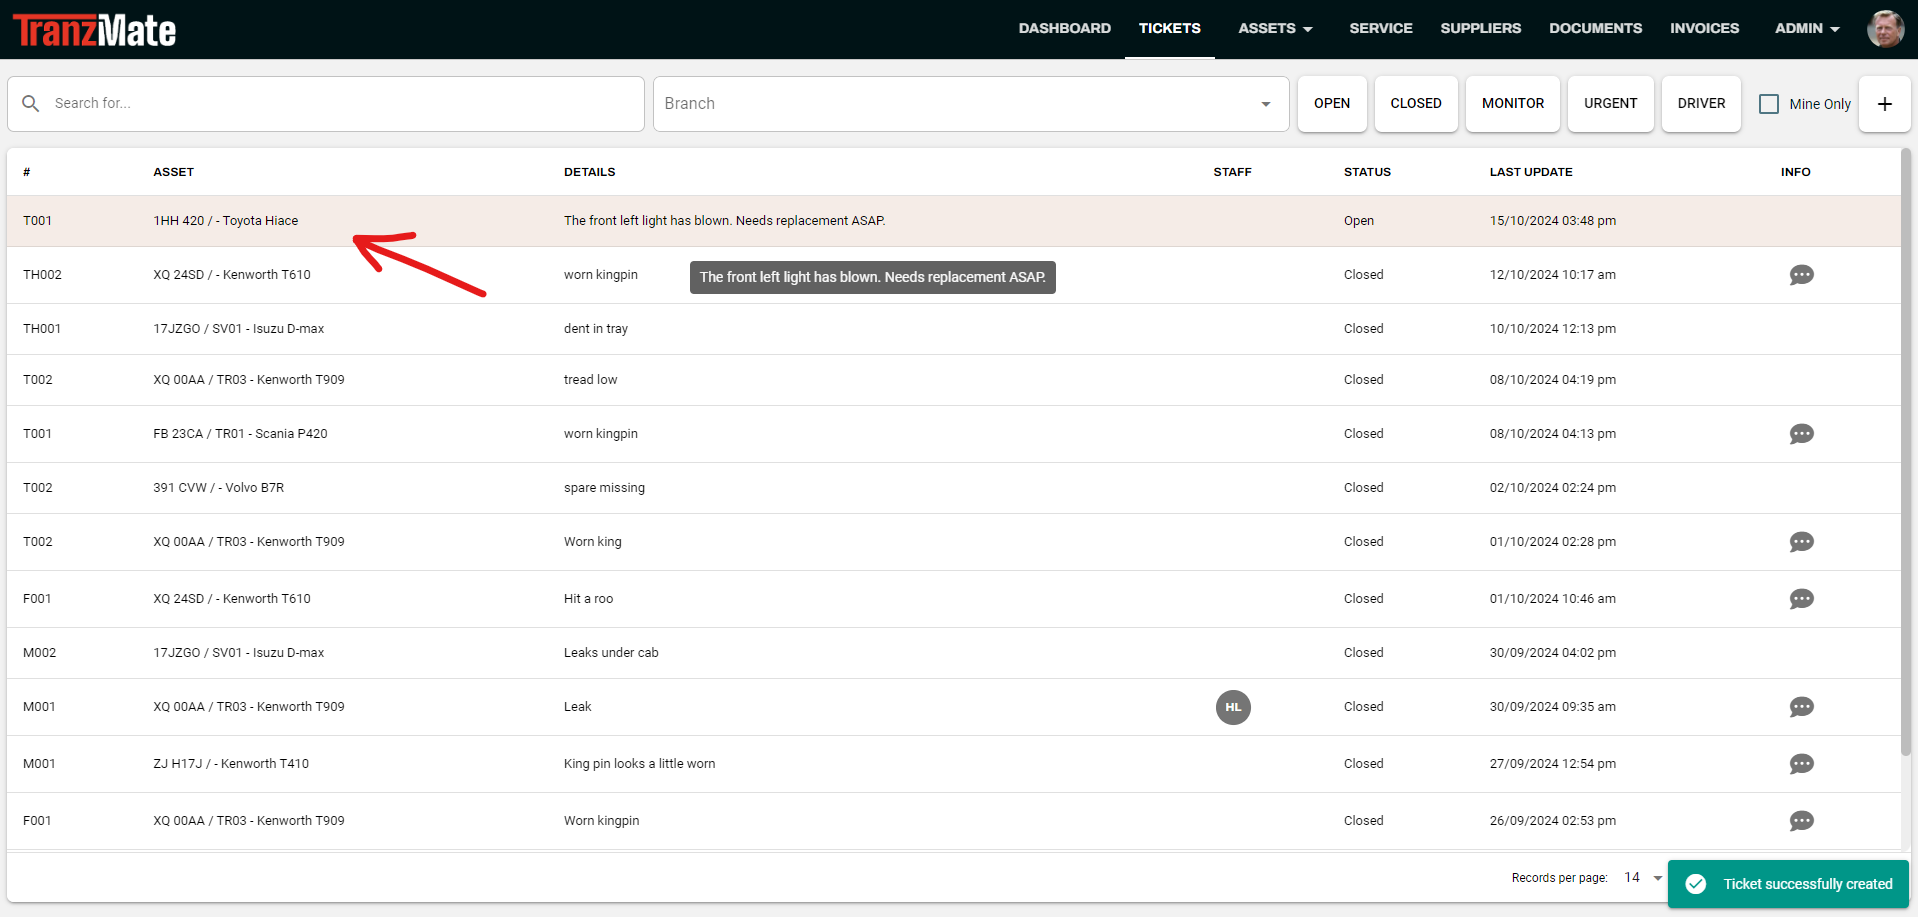
Creating Tickets
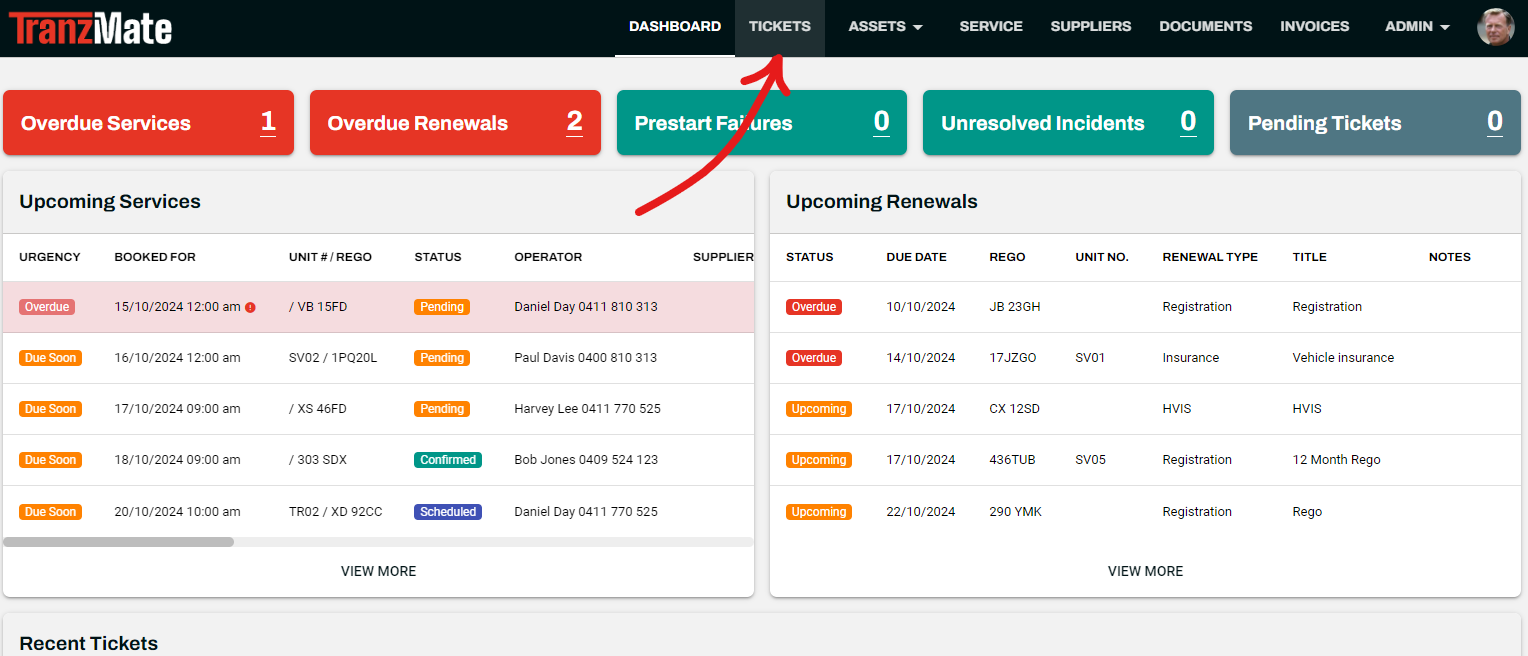
- Navigate to Tickets in the Top Navigation bar.
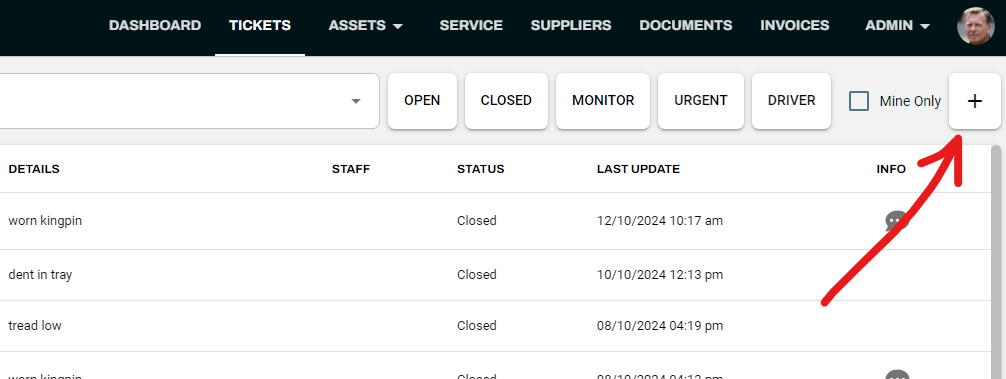
- Click the + button located on the top far right above the tickets table.
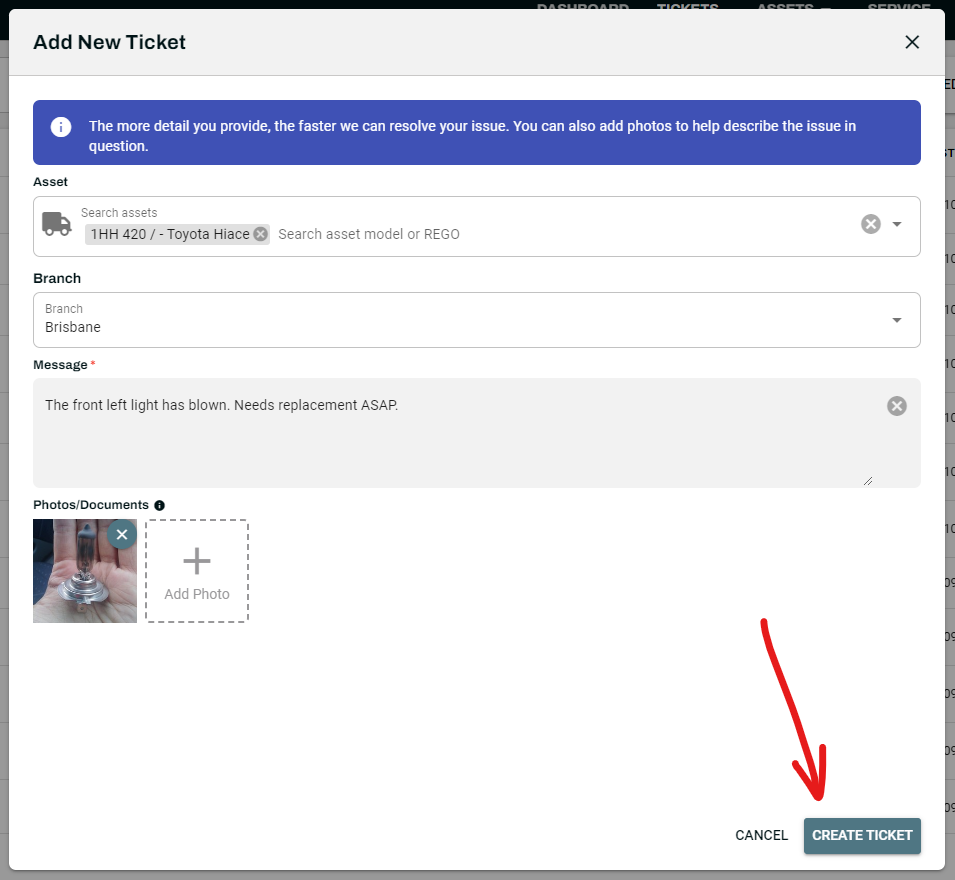
- The Add New Ticket dialog should appear.
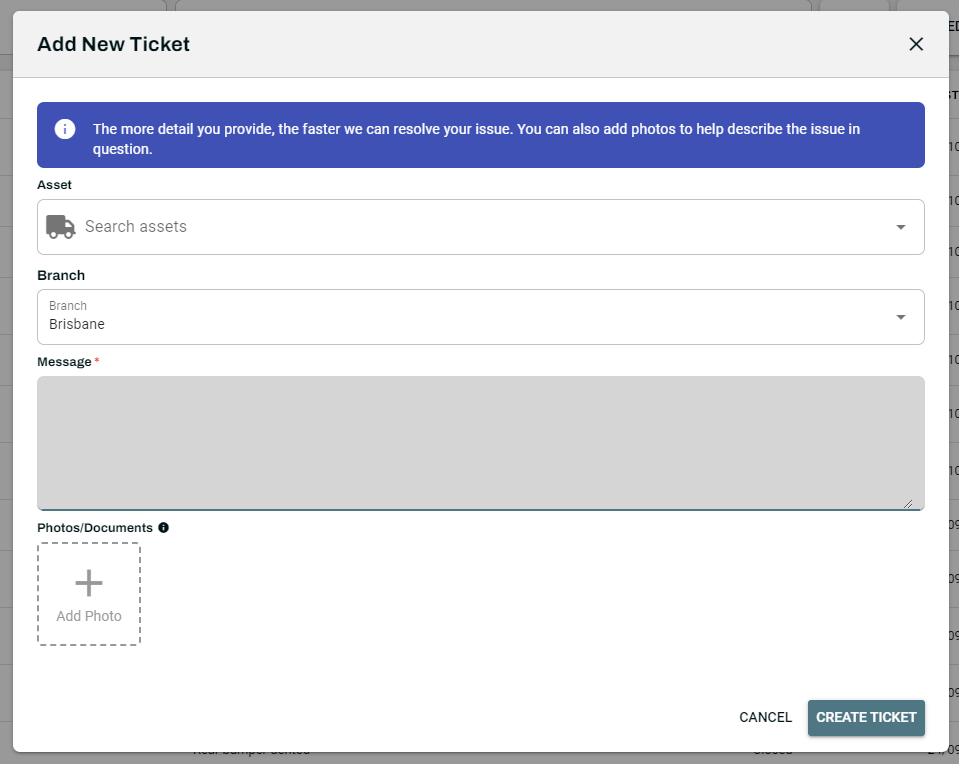
- Creating the Ticket
- Select the Asset you need to make a ticket for by searching for it in the Asset drop-down menu or by typing in its model name or registration number.
- Select the Branch you are from if your company has multiple.
- In the Message field, describe the ticket issue as clearly as possible.
- Upload any optional photos/documents to support your ticket request by clicking on the + Add Photo button.
- Click Create Ticket to complete the ticket creation process.
Once you have created a ticket, it should show up flashing orange in your tickets table. You can track its progress and respond to it in a timely manner by clicking on it from the tickets table or within the corresponding assets page tickets tab.
